

Flash bang
(or, how I shoot lightning)
Where I live we are always guaranteed a few summer storms, but they are infrequent compared to a lot of other places in the world. Which means that anyone trying to practice their lightning photography has less than 1-2 hours per month to get out there and hone their craft. With that in mind, I though some people might find it useful if I talked through how I go about capturing this fickle piece of natural magic.
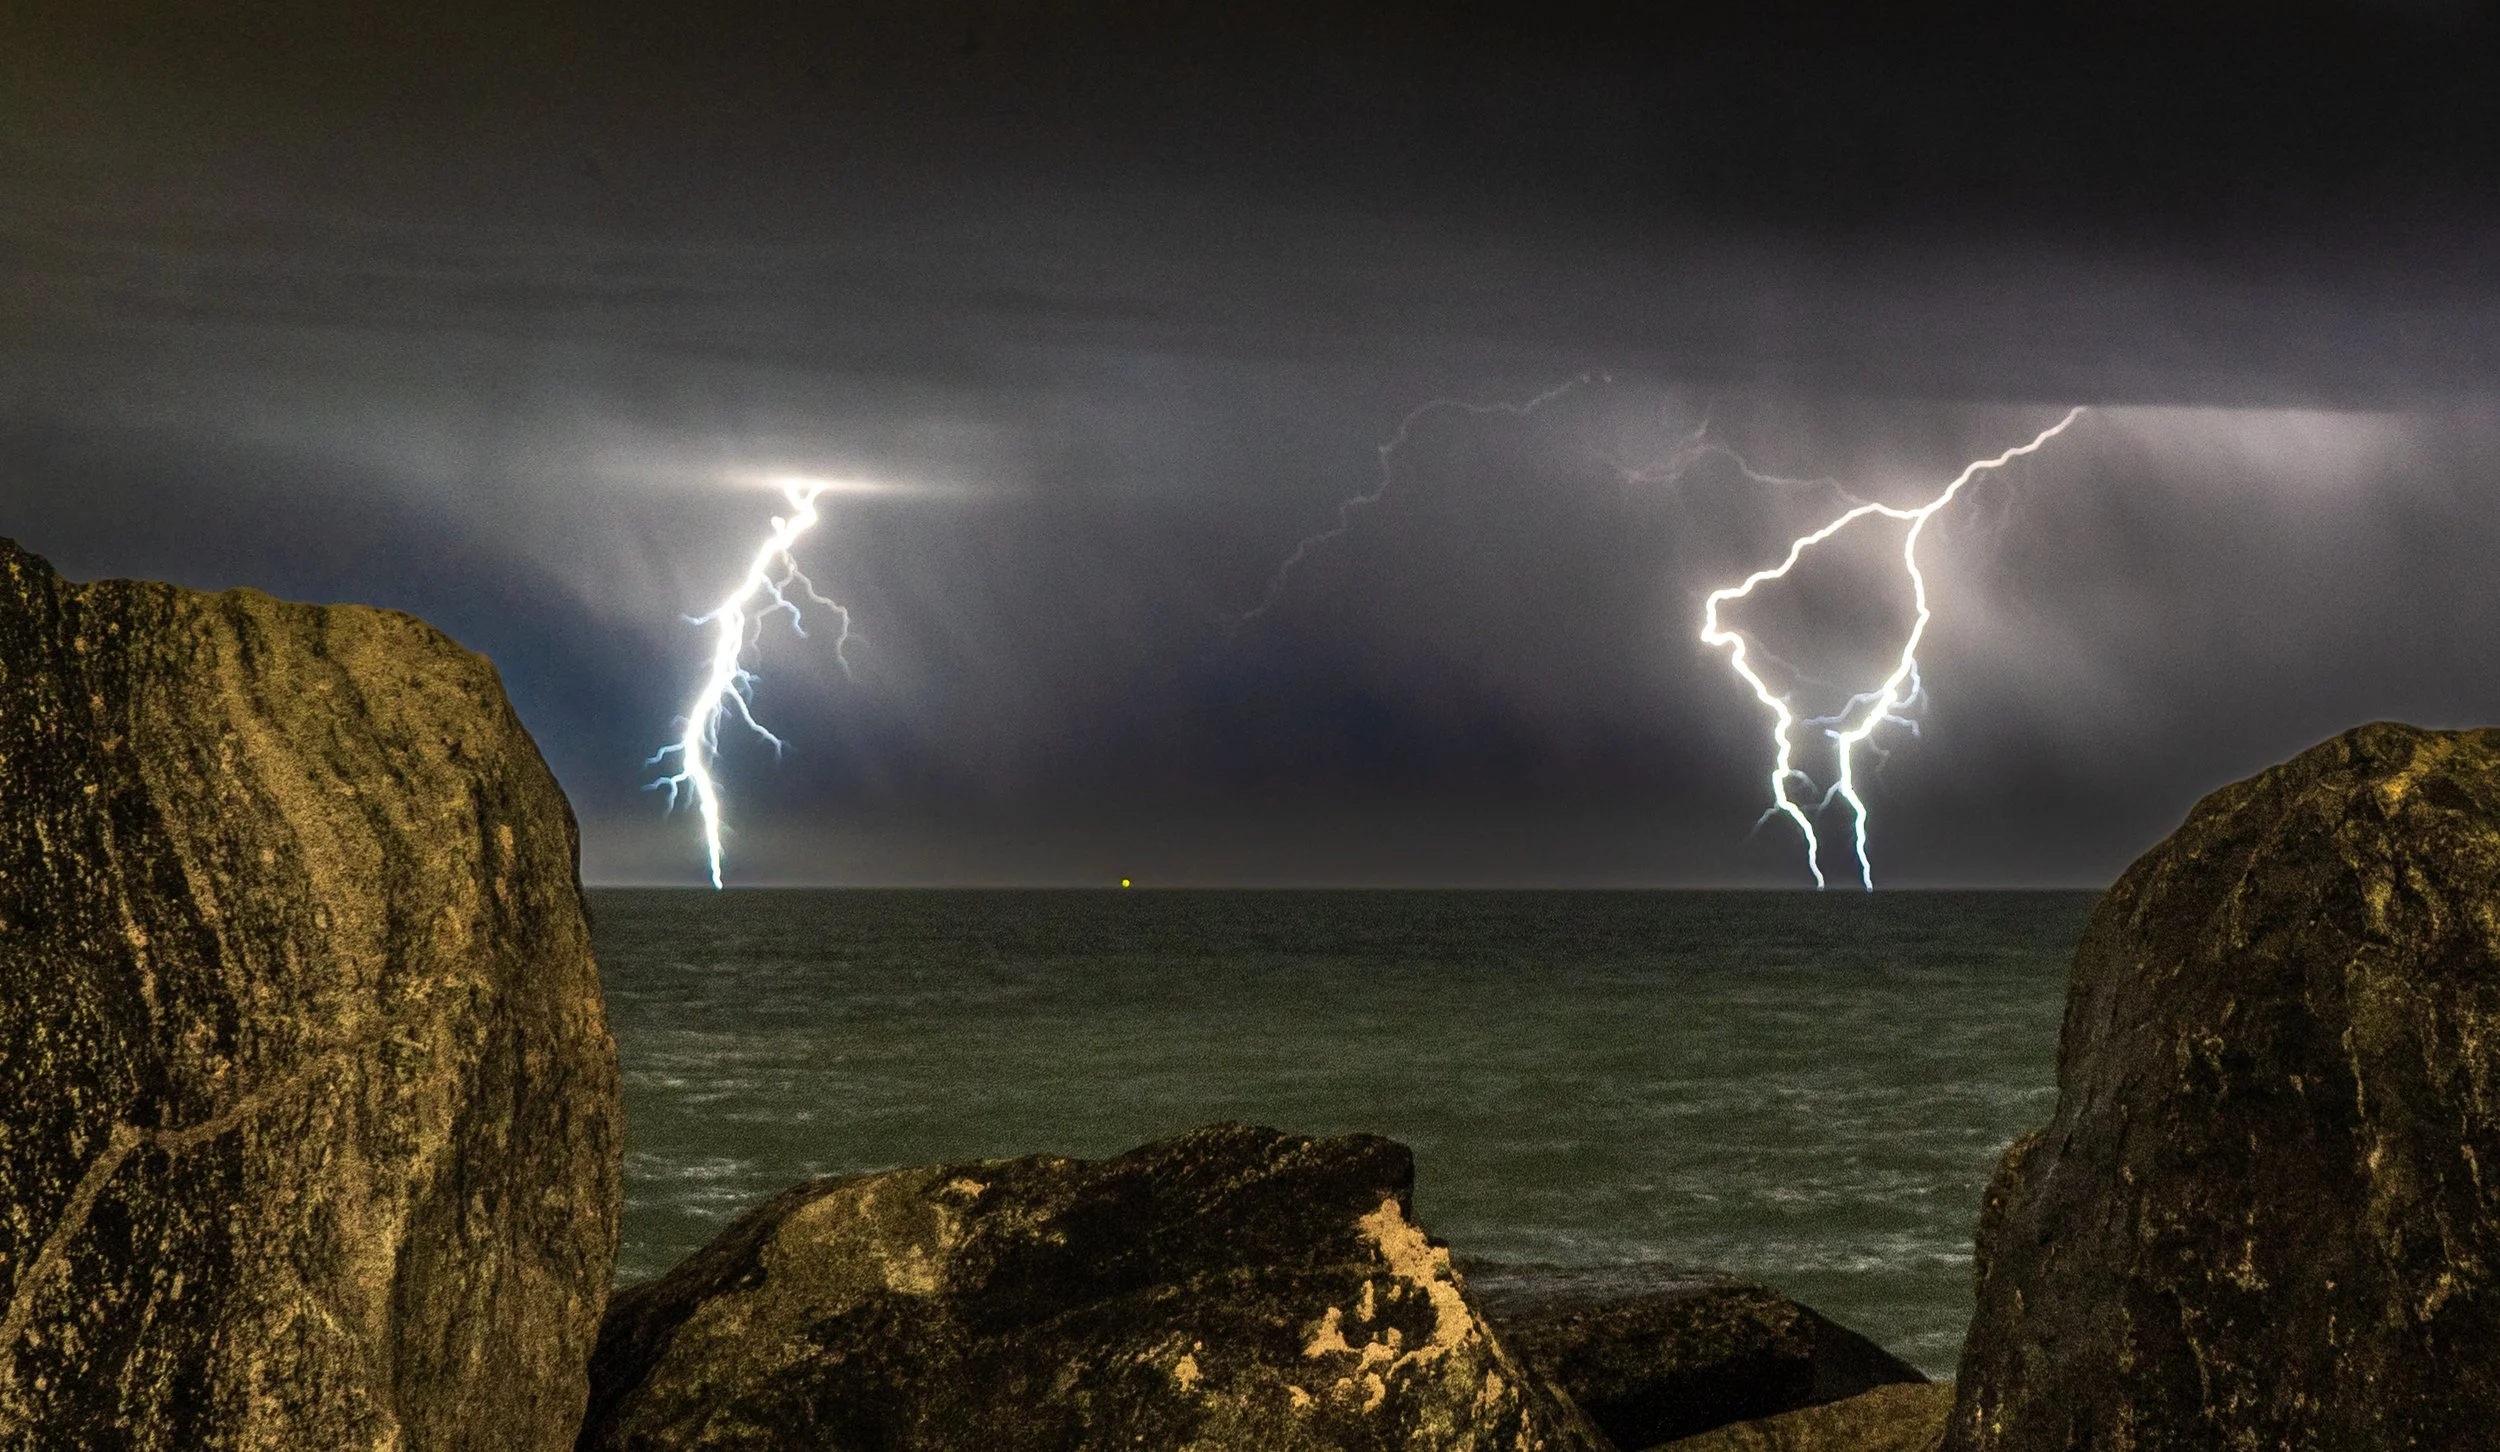
Lightning breaking over the ocean
Warning - Lightning is dangerous! Make sure you’re a safe distance away and not the tallest thing around. If possible use a remote shutter and hide inside a house or car. The camera is replaceable. You are not!
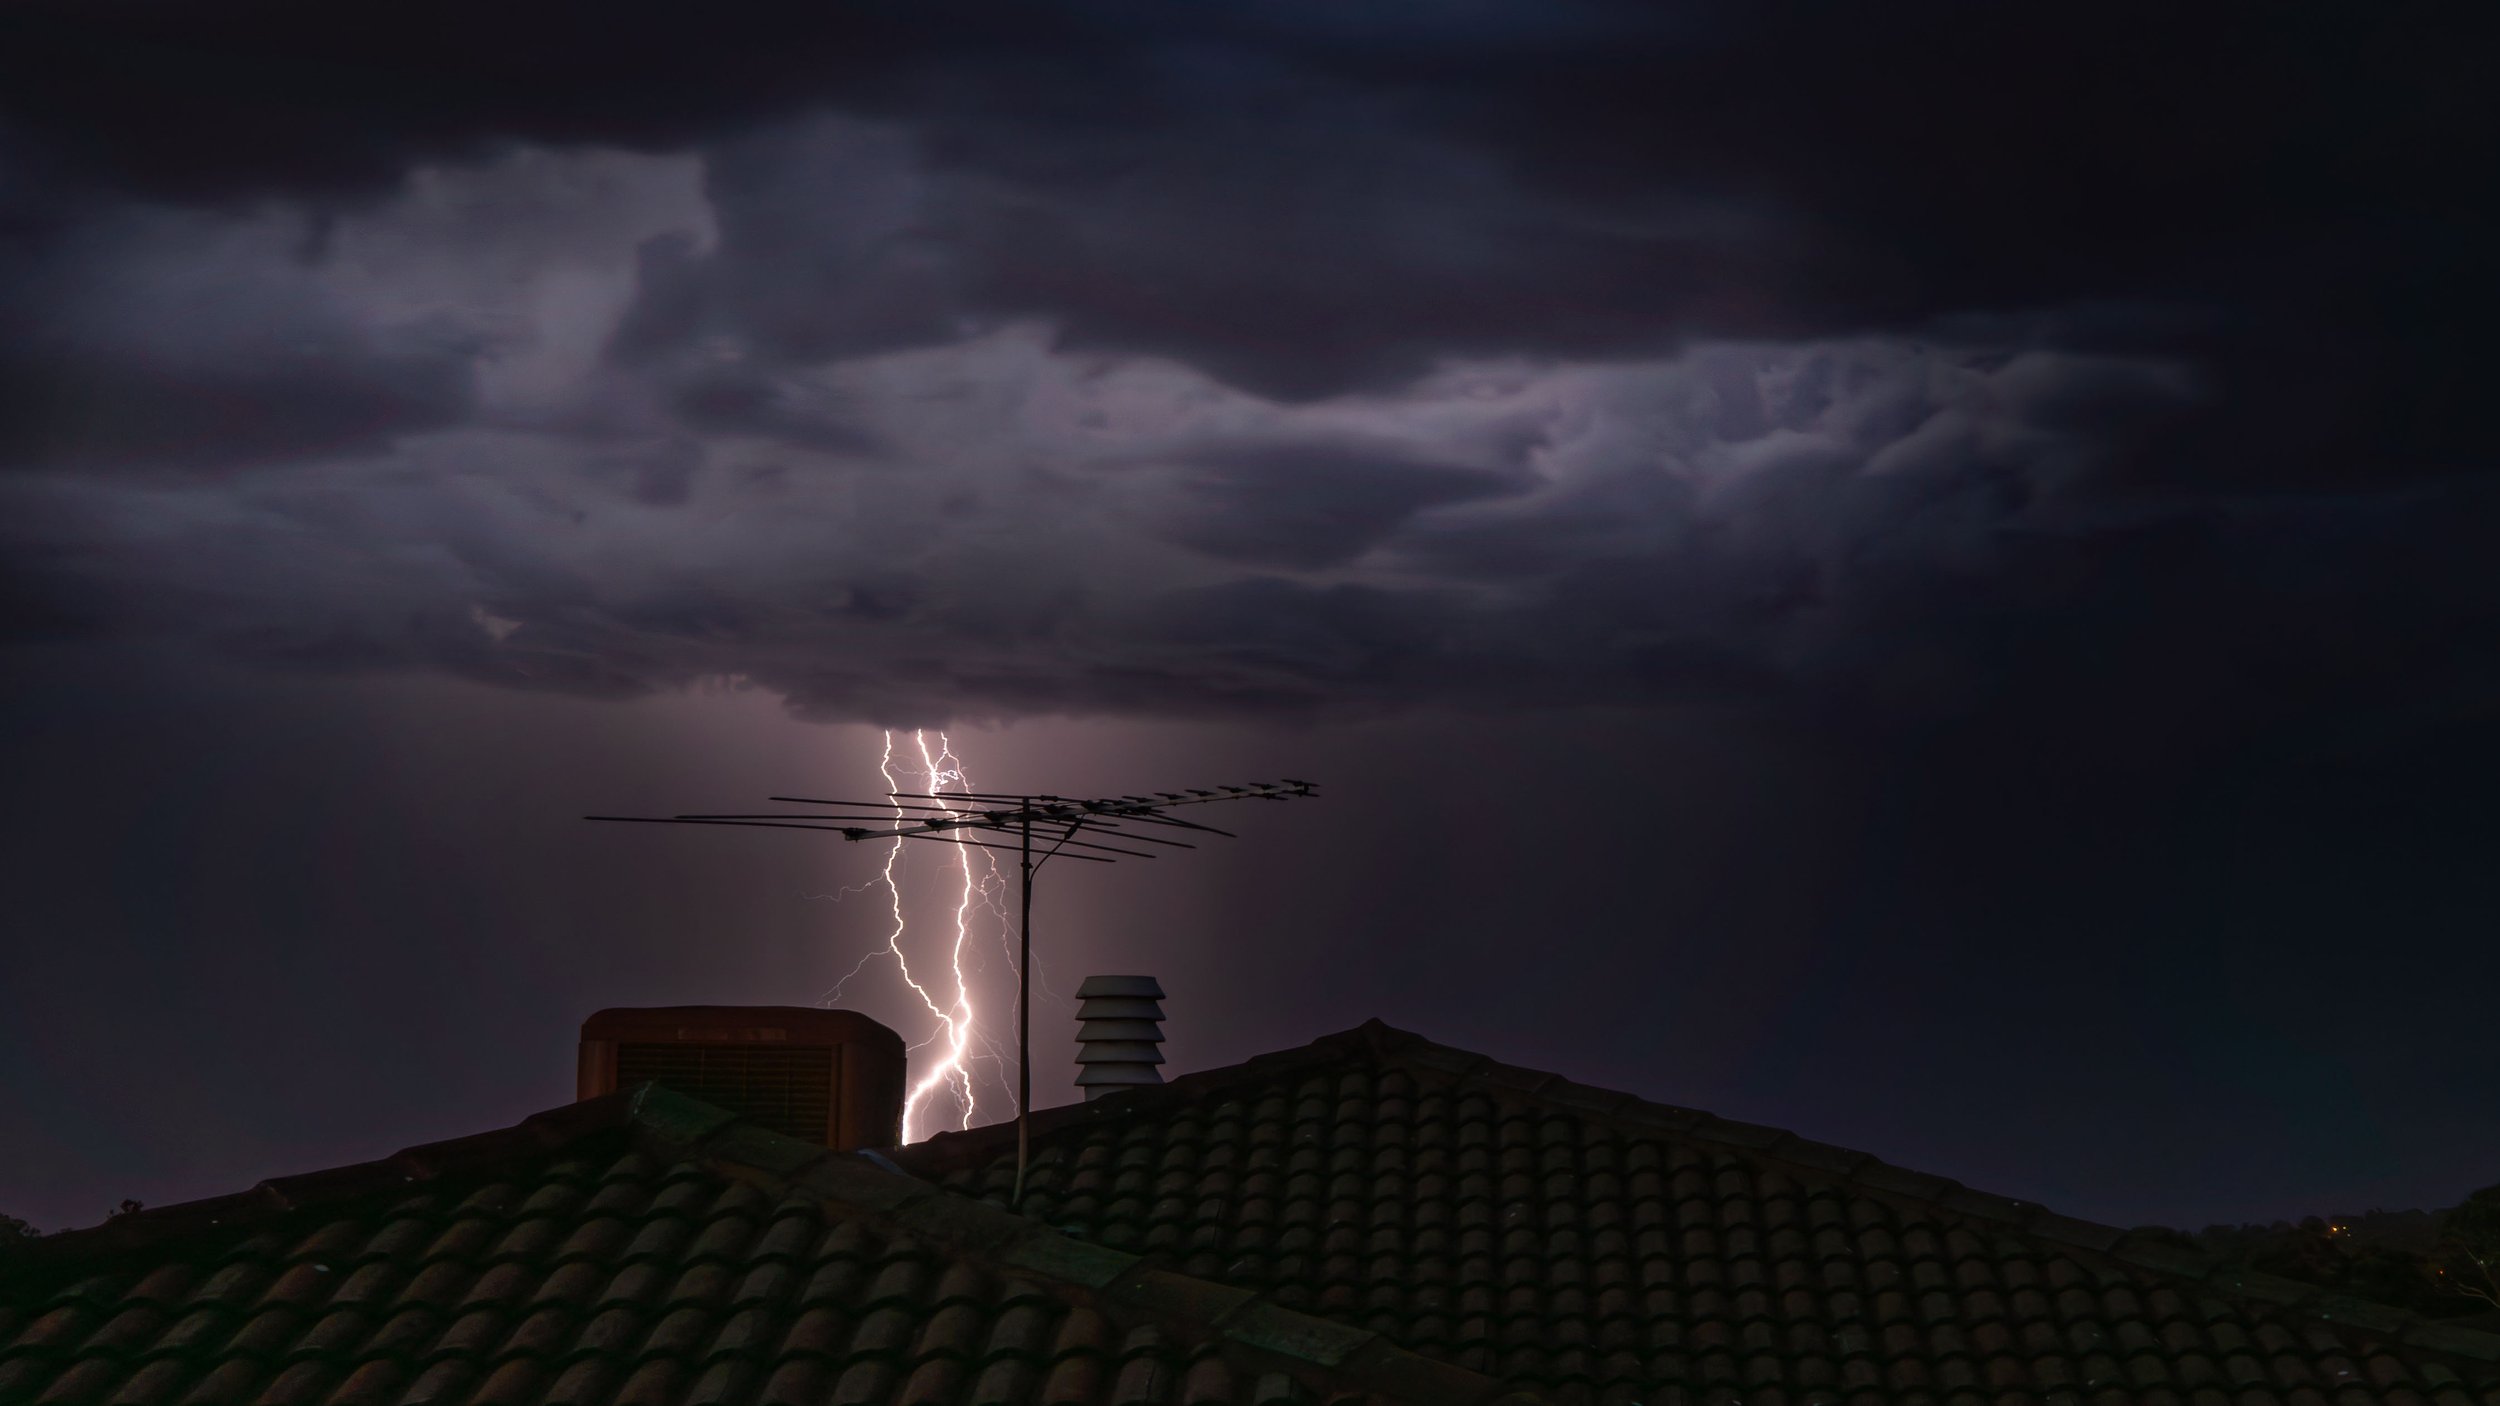
Lightning strike over a suburban rooftop
With that warning out the way, let’s get into it. First of all, let me say I’m no expert and I still learn something new every time I shoot. I’m sure other photographers reading this will be full of comments and mutterings, but this is how I do it.
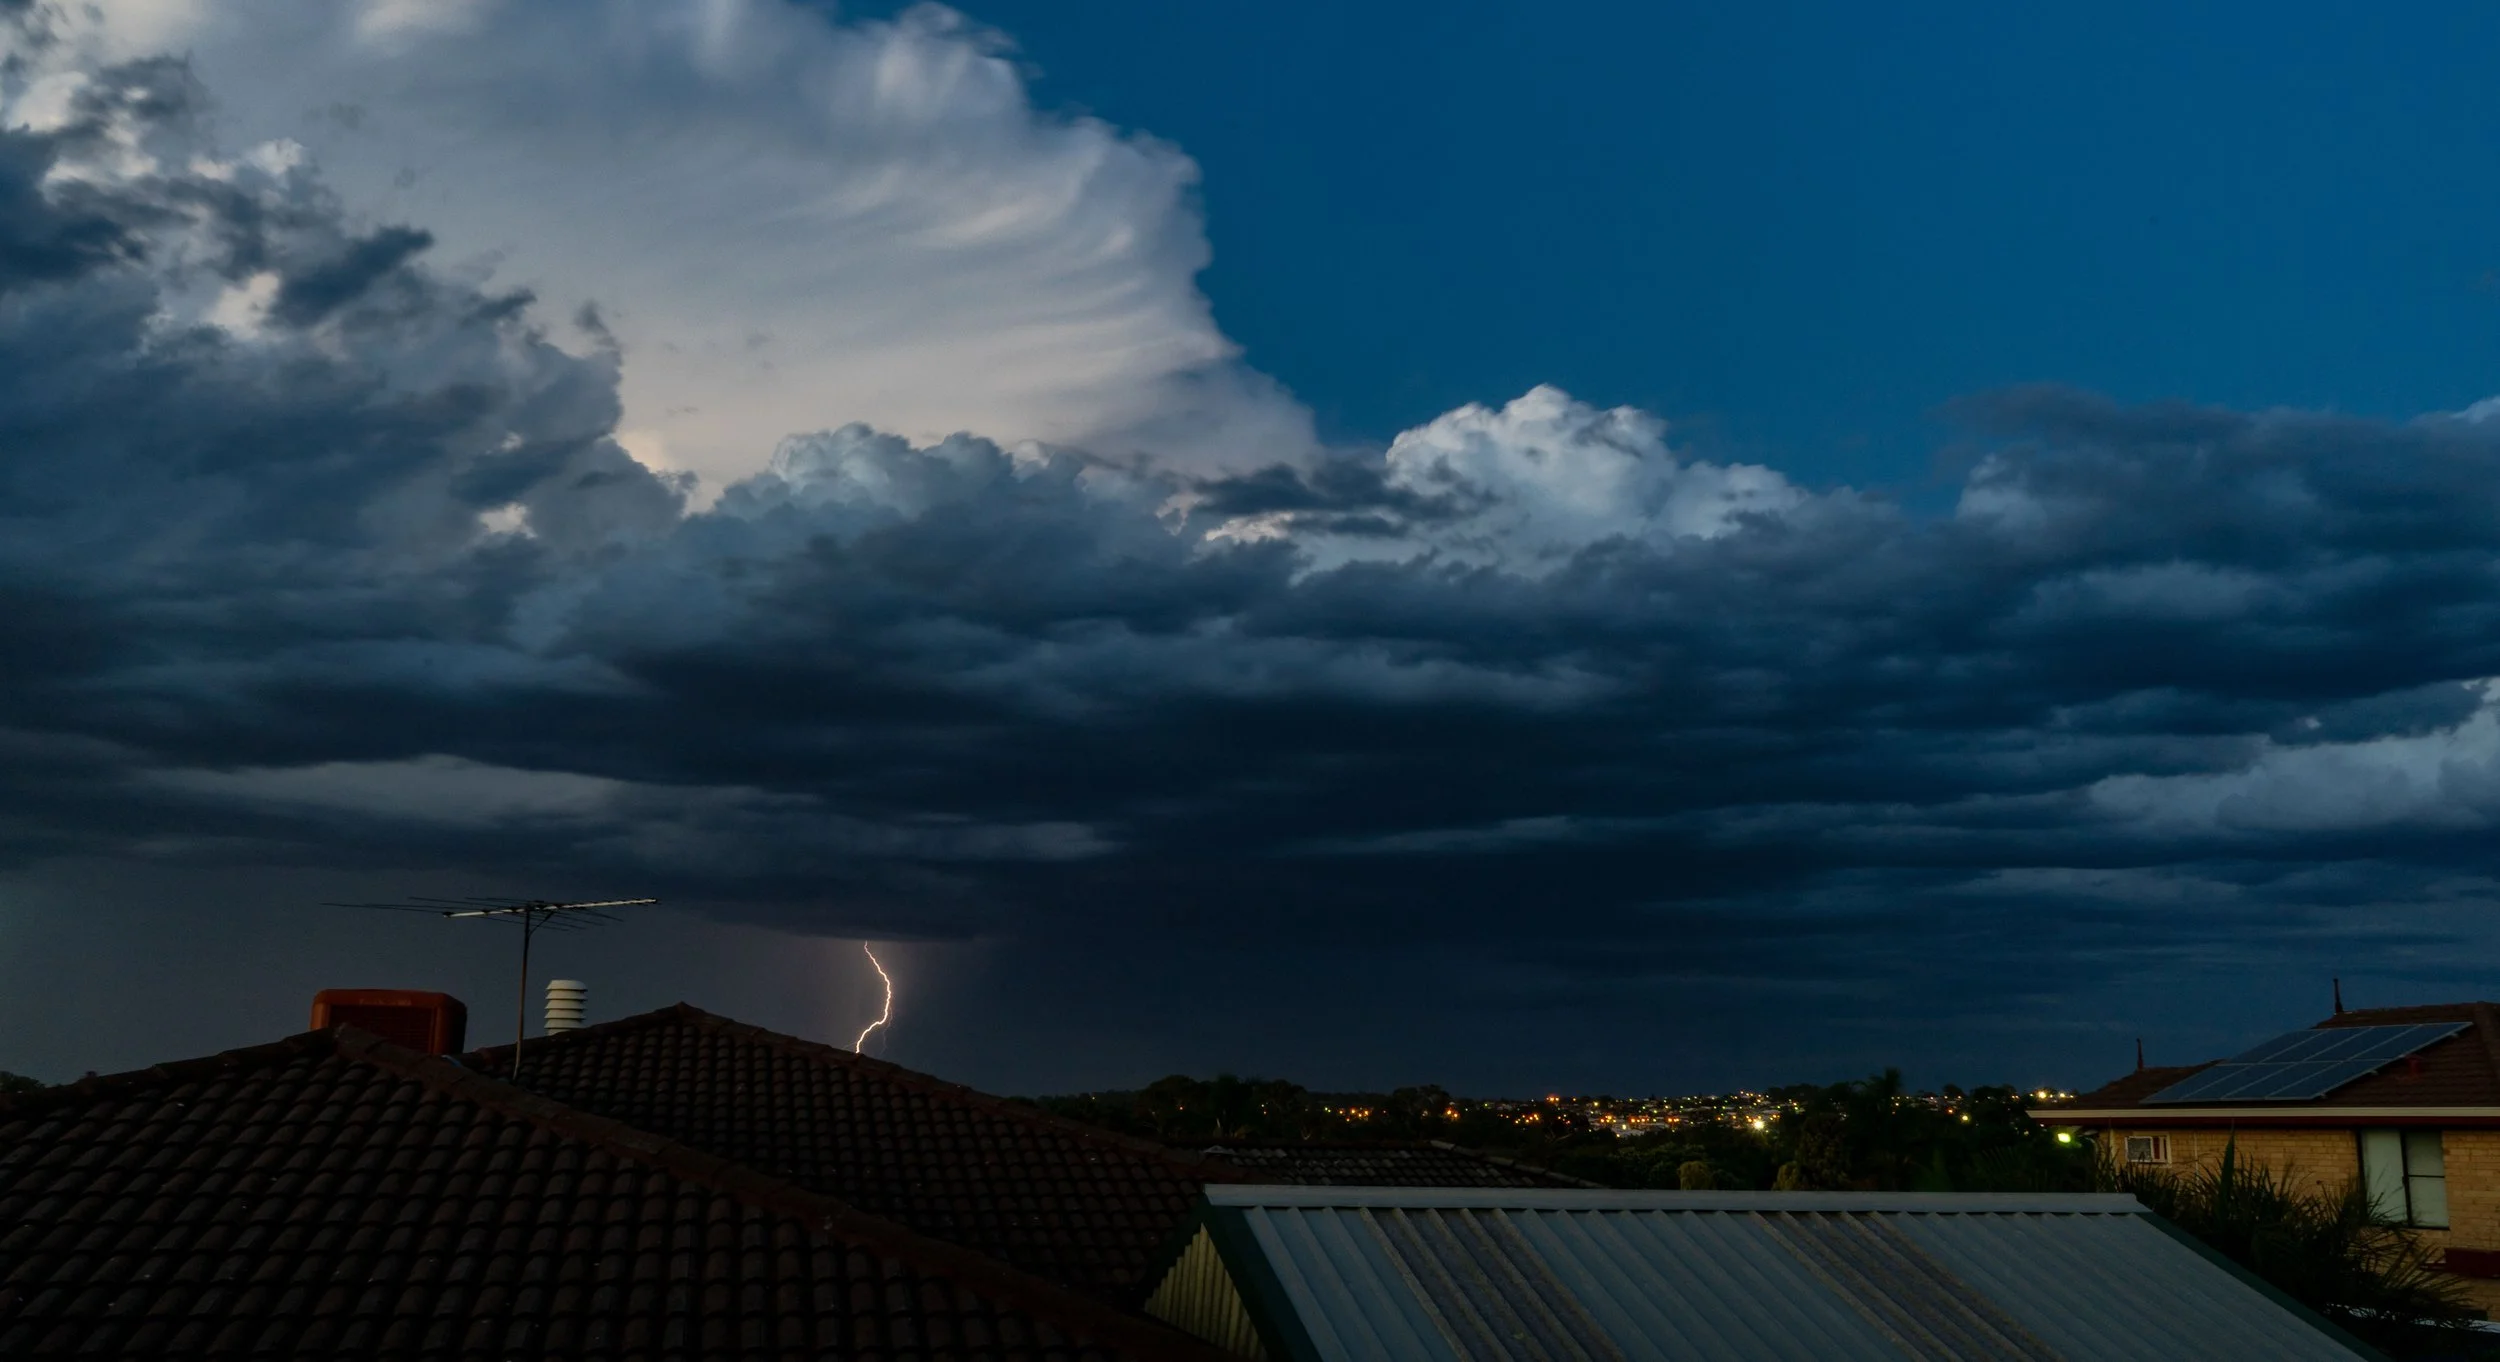
A storm front rolls in over a suburban landscape
Work out where lightning is coming from. This is important, as your camera can only capture what’s in front of it. So there’s no point making a stunning composition with a foreground feature like a dead tree or old building if the lightning isn’t likely to strike within your frame. That said, lightning does move with the storm and strikes randomly, which can make this trickier. The key here is to be flexible and move if needed.
Frame up your shot. With lightning likely to be your intended focal point (not always true, but often is) you don’t always need a stunning foreground. Often the clouds and lightning display make for an amazing photo on their own. That said, if you have interesting foreground elements, these can be accentuated by the lightning. Think dead trees, dry lakebeds, buildings, bodies of water, or even just a car, having something in the foreground can help your shot stand out instead of being ‘just another lightning shot’. There’s a lot of guides out there on composition, just remember that your photo should have 1 main subject that the other elements help to highlight. So if you have foreground elements, make sure the lightning will make them more interesting, not be a distraction. Alternatively, make sure the foreground elements draw attention to the lightning, such as leading lines.
Get your settings right. This will take some trial and error, especially as each lightning flash will throw a different amount of light and start from a different point. But it’s important to pay attention to Aperture, as this determines how much of your image is in focus. Got a cool foreground feature and want to capture distant lightning? Use a higher aperture (f22 for example) so that everything is in focus. Mostly shooting clouds? Go with lower aperture (f14 for example) to give added depth. Use an appropriate shutter speed for your method of shooting (see below). Make sure you adjust the ISO accordingly (I usually keep it on 100, but if you’re using a faster shutter you’ll need a higher ISO like 600-800). And most importantly, re-focus after changing settings.
Start shooting - patiently! As fast as lightning strikes are, take photographs of them requires a great amount of patience. I can remember spending 5 hours in the rain, changing locations multiple times, freezing cold, only to get 2 images of not-that-great lightning. Even on my latest outing I had a lot of shots that failed due to bad focus (I didn’t re-focus after adjusting settings). So it can be a hit and miss affair, with many hours spent out and about for little return. But when it does come together, wow does that feel good.
Edit. Lightning is awesome but the chances are that if the lightning is properly exposed, you won’t get the foreground perfect. This is where editing can make all the difference. Bring out those shadows. Use masks to brighten the lightning. Change the white balance and temperature to suit the image. I always shoot in RAW so I have ultimate flexibility when it comes to editing, this may not work for all people though.
Lightning can be epic!
So there you have it! that’s the basic steps that I follow, and while I’m still learning, I think it’s a good place to start. These steps also apply regardless of how you shoot. For lightning, there are four main ways to shoot that I’ve found, and I’ll caveat that I only use one. I’m also going to start in order of least gear required to most.
Be fast. This is where you sit with the camera, finger on the trigger, and hope that the time it takes to “see lightning, register lightning, move finger, activate trigger, open shutter, close shutter” is less than the time it takes for the lightning to disappear. While this can work, it relies a lot on being lucky, and usually only gets results if there are multiple strikes at the same time.
Time lapse. Most modern cameras have the capability to do a ‘time lapse’ function, where they take shots at pre-determined timings (1 second, 5 seconds, etc.), meaning you can set the camera up and just let it shoot for 20 or 30 minutes, hoping that a shot happens to coincide with a bolt of lightning. This again relies on a certain amount of luck, but is a good option nonetheless.
Long exposure. If you happen to be shooting at night, or have an ND filter, you can use long exposures to capture the lightning. This means setting your shutter speed to a long time (5-30 seconds) and hoping you get a strike (or multiple strikes) in that time. Dialing the aperture right down can help here as well, but bear in mind that you lose depth in your photo if you go too high (I usually opt for 14-22, depending on the scene). Anyway, the idea is that your camera will capture anything that happens while the shutter is open, so as long as you get strikes, you’ll get shots. Bulb mode can be very handy for this, as it allows you to keep the shutter open for minutes at a time. Coupled with dark skies and a small aperture, I was taking 2-4 minute exposures and still not over-exposing the foreground. This will need some playing around to get right, but is a great way to capture multiple strikes in the same image. I also recommend using a remote trigger or the timer function on your camera so that you don’t induce camera shake when you activate the shutter.
Lightning triggers. Full disclosure - I’ve never used a lightning trigger, partially because I’m happy with the results I get, but mostly because I don’t have the funds to purchase one yet. These connect to your camera and activate the shutter automatically when lightning strikes happen. It’s important to experiment with camera settings so that your foreground is exposed properly, but as all strikes are different, this can get tricky. Just keep refining and you’ll get it.

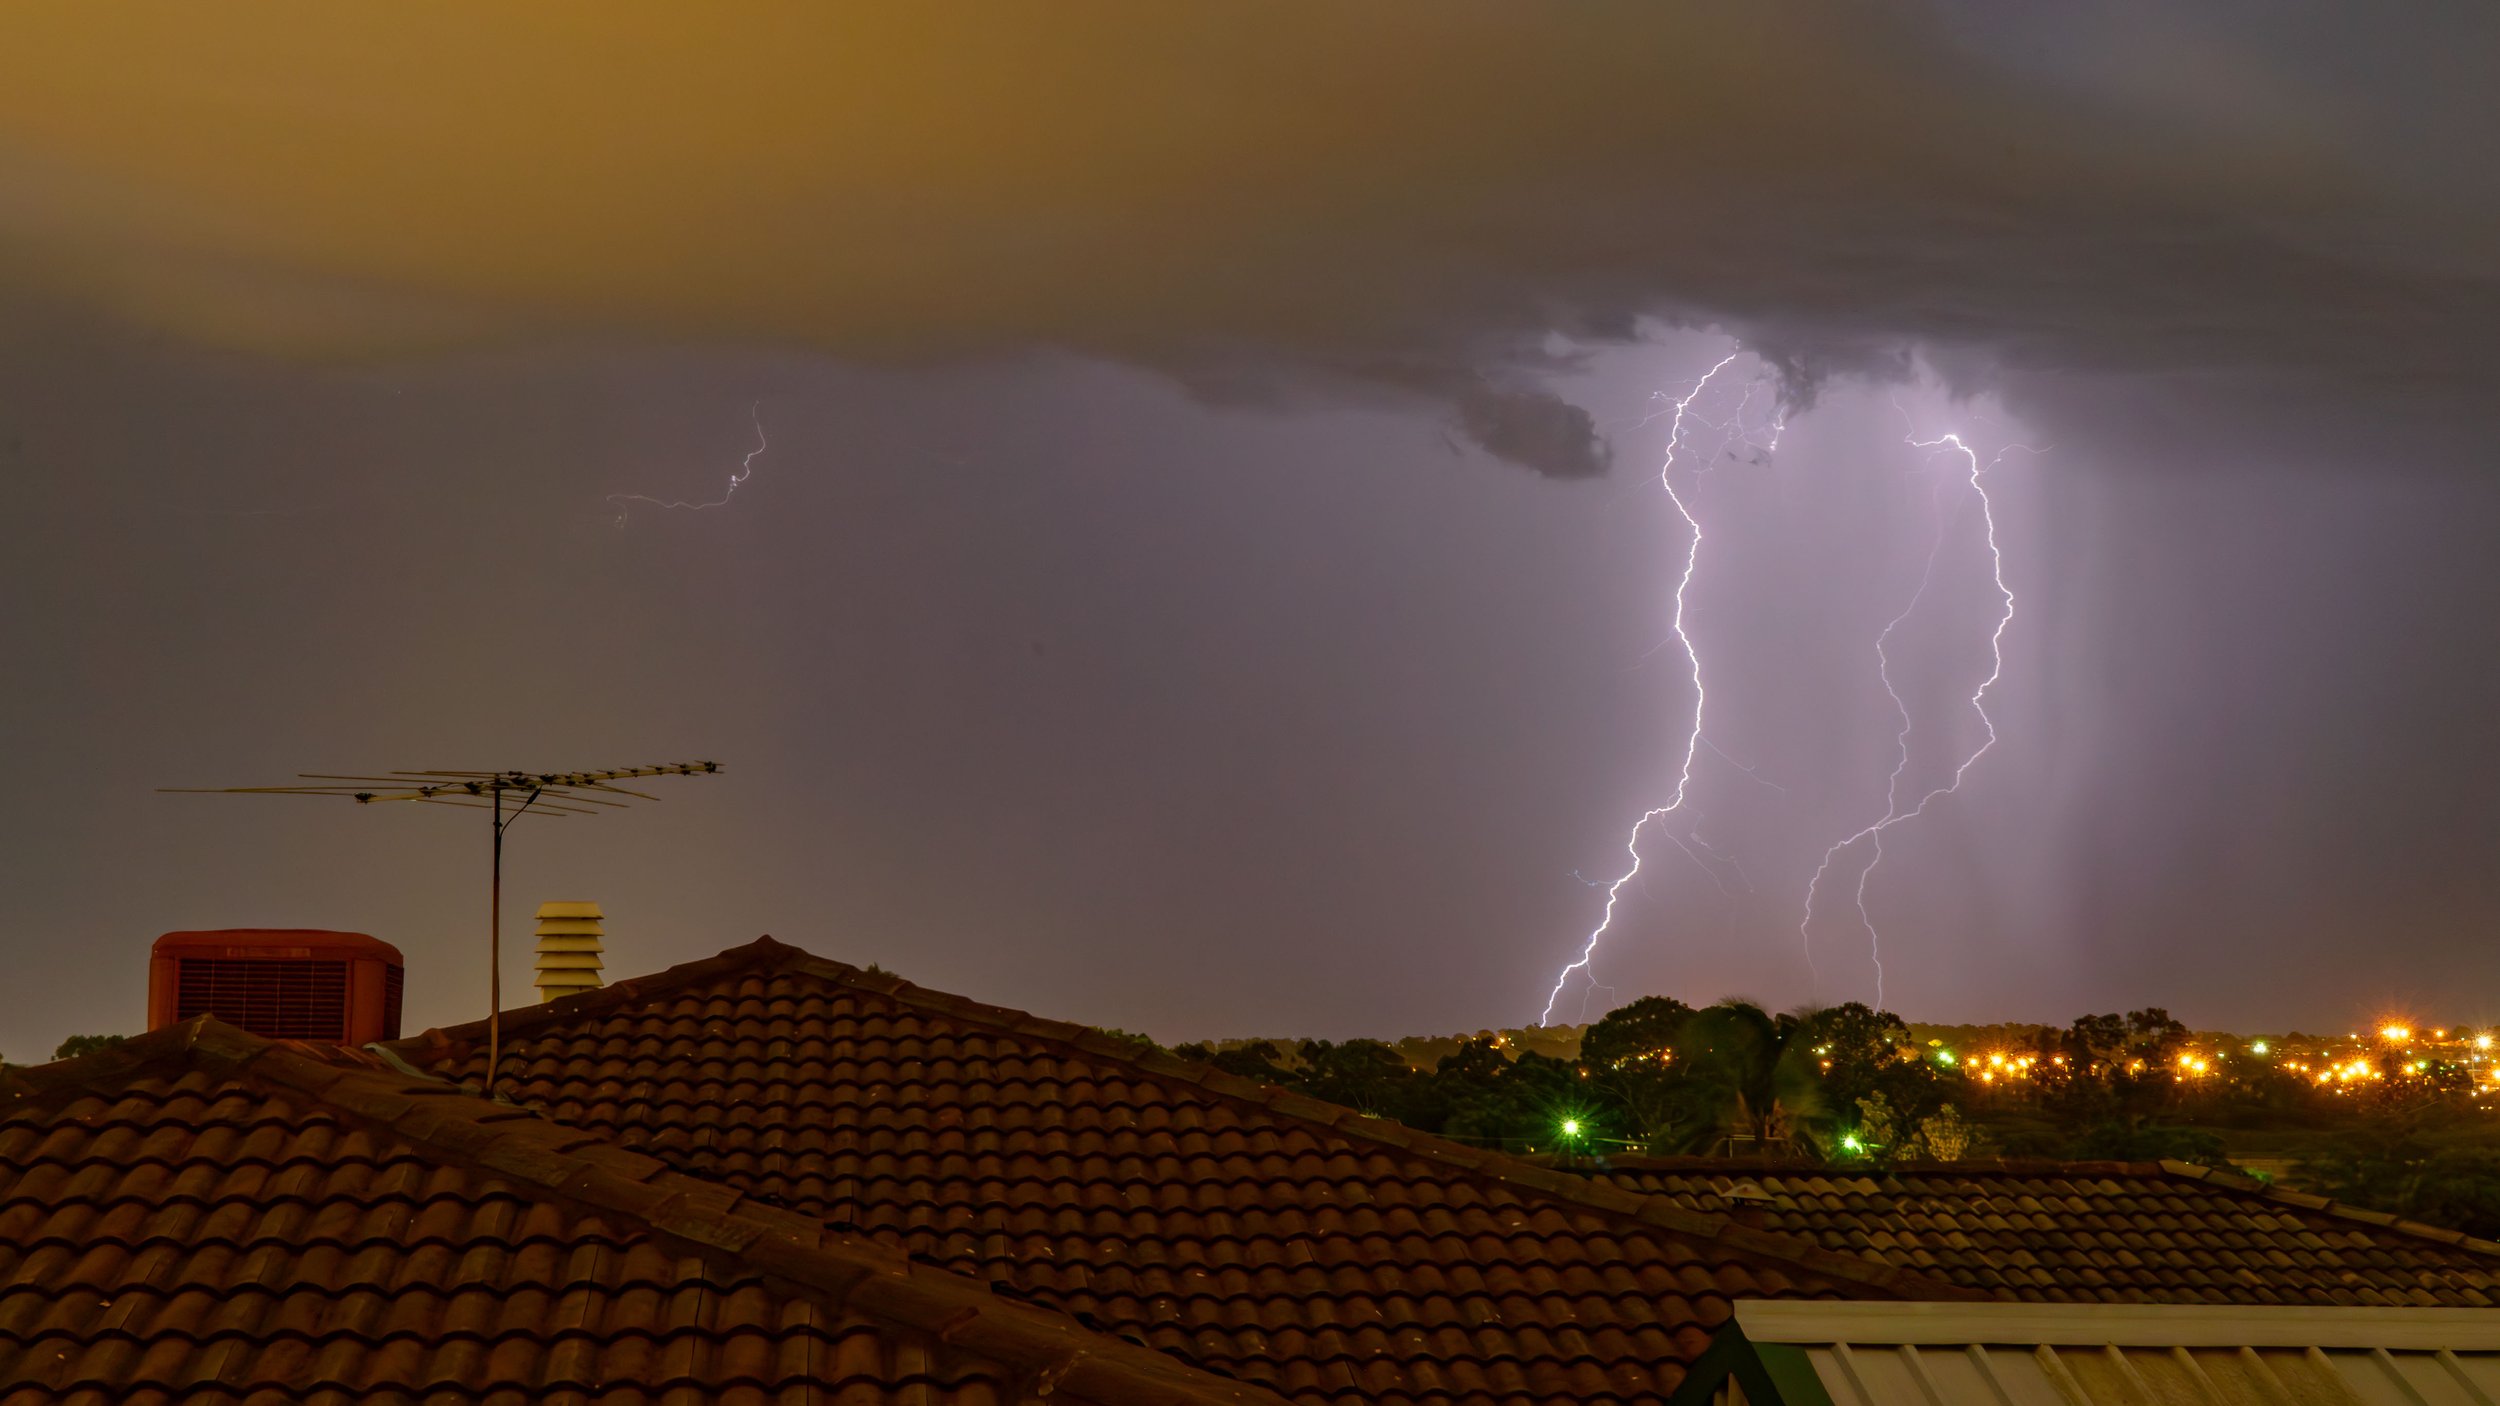
Lightning strikes behind a dark brooding house.
And with that, I think you now know everything I do about shooting lightning. As with all things the best way to get better at it is to get out and shoot, see what isn’t working, and try different things to fix it. It will take time too, so just relax and enjoy it.
If you found this helpful, or have any comments, please reach out and we can chat.

A crackling lightning bolt burns bright against the black sky
I’m intending to do a few more of these ‘how to’ blog posts but if you want other sources, I recommend Nature by Nathan. Link to his lightning guide below.